Showing posts with label Science Experiments. Show all posts

Monday, December 19, 2011

Astronomy Unit: Refraction, Vacuum, Saturn's Rings

The kids have been begging for some hands-on science experiments. I have a bigger unit planned, but since December and January will be a bit broken up as far as our schooling goes, I decided to delve into a short unit with lots of experiments based on one of Janice VanCleave's books (202 Oozing, Bubbling, Dripping, Bouncing, Experiments) and lots of notebook/lapbook pages from Homeschool Bits. Here's some of what we've been up to so far:

1. Bent Light - Refraction
We placed a penny in two cups and poured water in one cup.  Then we put a pencil on the ground when we couldn't see the penny any more.  For all three of us we could see the penny that was in water longer than the one with air.  We talked about "refraction" and LD made a great connection to Brian in Hatchet who tried and tried to spear a fish unsuccessfully. Finally, he realized the water made the fish appear in a different spot and he was able to spear them.
We measured the distance between the pencils for the three of us.  For me it was 6 1/4 inches, for LD it was 5 1/4 inches and for DD it was 4 1/4 inches. We talked about why that was the case (the differences in our heights and the angle of our eyes to the penny).

The kids all wrote down a few key words for each science experiment to put in their science notebook.  I thought it was lovely that ED demanded a paper and wanted to write letters on her sheet as well. She was so diligent!
2. Vacuum as a Heat Shield
This experiment also led to some fascinating discussion.  We boiled some water and checked the temperature. Then we poured some of the water in a thermos and some in a cup.
Next we talked about the vacuum in space and the fact that it is very cold.
I explained to the kids that the thermos had a partial vacuum.  Then I asked the kids to predict which water would cool down more quickly.
LD predicted the thermos would cool quickly because space (the vacuum of space) is so cold.  DD predicted the water in the cup would cool more quickly.
We went on to our last experiment and came back 15 minutes later to check the temperature.  The water in the thermos was nearly the same as it was originally while the water in the cup had cooled significantly. We talked about the fact that space is a poor conductor and thus acts as a heat shield whereas metal (we felt the end of the thermometer is a good conductor, transferring heat easily).
 3. Saturn's Rings
We have gone over the planets numbers of times in our homeschooling adventures here.  Today we reviewed the planets, their locations and sizes.

We got a piece of paper with two circles on it (the inner one for the planet, the outer one for the field of debris icy particles and rocks, that encircles Saturn). They sprinkled sand evenly on the paper. Then the kids placed the end of a Popsicle stick down which represented one of Saturn's moon. I turned the tray around and we watched as the sand was pushed away. Scientists believe the moons push the icy particles around into separate bands which make the separate rings of Saturn.

Last year we did a hands-on unit on Earth Science if you want to see some of the activities we did related to that.

Thursday, December 8, 2011

Forest Unit: Fabulous Science Activity!

As I mentioned yesterday, we did a lot of reading about owls to lead into the awesome science study on owls!  We talked about the forest food chain (who eats whom) and then I asked them what owls ate. Owls eat mice, voles, snakes and other small animals. They swallow their prey whole and about eight hours later spit out the parts they can't digest in a pellet of fur and bones. We talked and read about this in some detail... and then I brought out owl pellets for them to dissect!  The kids raved and raved about this.  This was one of the highlights of our year so far!

So here are the pics... I was so excited that I took over 40 pictures!
The owl pellet as it was received. By the way, I know I paid a about two dollars per pellet but can't seem to find where I purchased it! Sorry.
Everyone dug right in -- ED was just as engaged and excited as DD and LD!
We were all so excited as various bits of the skeleton emerged. It tied in so perfectly with our earlier studies of (human) bones.  I've had these pellets since the beginning of the school year and it's been so hard to wait!! But, I'm so glad I did because they got so much more out of it having done the other studies first. 

We looked through our mammal book and concluded these were mouse skulls.
The kids were so engaged and it went on so long, they asked me to start reading more about owls.

If you get the chance, I highly recommend doing this. What awesome, hands-on science!
At first I couldn't remember where I got these. Just wanted to add, I'm pretty sure I got my pellets from nature-watch.com. I got the large ones for $2.95. Here's the link for the large owl pellets.

They have a free bone sorting chart here.

They state at their site: "Owl pellets have been carefully sterilized to ensure safety." 

Wednesday, November 2, 2011

Spooky Science, Monster Writing

We had such a great homeschooling day on Monday. I was skeptical we'd get into the groove since we had just had my niece and nephew with us for four days. I brought in some spooky schooling, though and we had a terrific day!

I went out and bought some dry ice and we did a number of experiments. You can see suggestions from Steve Spangler science and a couple of you-tube videos here and Scientific Tuesdays.

First I dropped dry ice into the spooky skull cup Daddy bought for the kids.  Then we did the one with dish soap (left) that created lots of bubbles.
We placed a coin on a block of dry ice and watched it move back and forth as the coin warmed up the ice and made pockets of carbon dioxide move past.  Then we left the coin and went on to other things--only to notice later all the ice crystals that had formed on the coin.

We added warm water to a plastic water bottle and then added chips of dry ice.  Then we put a big punching balloon on it and watched it inflate.  The kids were intrigued by how much carbon dioxide was released. We also had a terrific talk about the different weights of gases, hauled out the periodic table and looked at where hydrogen and helium appear on the table.
We used a bubble solution to create these massive bubbles in a pot.  The kids liked that!

From there we went on to some writing activities.  I have a reluctant writer, but LD absolutely LOVED this Monster creative writing packet!!  So believe it or not, LD and DD spent an our and a half writing and drawing!  First they wrote descriptive words about a monster. Then drew its picture. Then they went on to brainstorm some questions (a monster's name, place, etc.) and wrote a poem with alliteration.  Finally they did more brainstorming before writing a story.

Wednesday, June 8, 2011

This and That--Garden Science

Plants, plants, plants!! That's still the main focus of our homeschooling life. The kids are enthralled by the growing process this year. The kids tenderly attend to their plots in the garden. We watch each strawberry ripen eagerly. They rush to inspect the blueberries and peas forming! They help bring in the lettuce for our supper each evening.

And, they/we are loving the Junior Master Gardener handbook -- and are enjoying the activities and experiments immensely. Here are a few activities from last week:

 Bean Maze: This is a bean plant placed in a box (before we sealed it up to be dark).  We're hoping the bean plant will make it's way through the various cut-out windows to find the light at the end of the maze.
In this experiment, LD had to cover a part of the plant for two weeks to see what will happen when part of the leaf does not receive direct light.

This activity shows that some plants do not grow directly from seeds, but will form roots from the stems themselves.  LD is using mint and catnip for this activity.

How are plants affected when the seeds are planted upside-down or sideways?? LD hopes to find out in this experiment!

Tuesday, April 12, 2011

Colors in Milk -- Science Experiment

Here are the other two experiments LD and the girls did.  It sure was nice just stepping back to watch the kids do this themselves this time round.

Color Changing Milk

1) Pour milk onto a plate
2) Add three drops of food coloring (red, blue, yellow)
3) Place a Q-tip in dishsoap. Then carefully place the Q-tip in the center of the plate without moving it around.  The colors start to move and swirl as the soap displace some of the milk fats.


This last experiment is pretty simple.You simply place three skittles (or M&Ms) in a bit of water.  The kids then try to predict what will happen as the colors dissolve off the candy. The kids predicted the colors would mix, but as you can see they didn't. We talked about the fact that there was equal pressure from all sides as if we had our palms out and were both leaning a little bit toward each other.

Monday, April 11, 2011

Oil and Water Fireworks -- Science Experiment


LD was itching to do some of his old science experiments this morning.  We had all of the directions collected on a 3X5 ring (from when we did them a year+ ago). LD leafed through and chose several experiments.

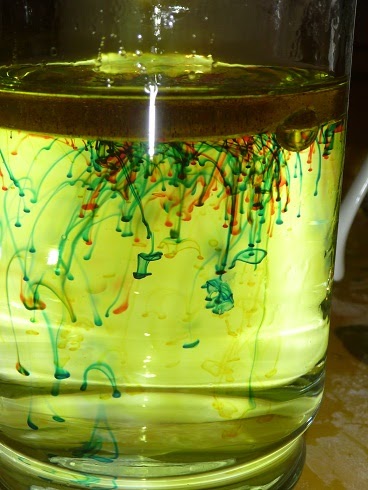
Here is the first one he and the girls did. It's been over a year since we last did this experiment, but it still had a real "wow" factor for all of us. The kids each took turns doing it (LD did it four times!)

1) fill a glass jar with water
2) put 2 Tablespoons of oil in a pitcher and add 3 drops of food coloring each of red, yellow and blue (not too much or the color will drop out of the oils when you pour it into the water)
3) stir the oil and food dye well to break up the dye into small droplets
4) pour slowly into the water and after a few moments you'll see the fireworks begin as the food dye slowly drops out of the oil suspension.
You can see we had a bit too much yellow dye, but all the other photos turned out blurry.


Here is an example from when we did this another time:
We did a similar experiment with shaving cream that was just as spectacular! See this post: Shaving Cream Fireworks

You may also be interested in these preschool science posts:

Free Science Experiment Pack (at our new location, homeschoolden.com)
Chemistry Experiments and Activities for Young Learners: You'll find a half-dozen chemistry experiments my youngest did during our chemistry unit (she's 7). Some of these make good science activities for preschoolers too even if they don't understand the complex science behind it! 
http://homeschoolden.com/2015/10/29/chemistry-experiments-for-kids-grade-2-mixtures-chromatography-dna-kit/

 
Preschool at Home: This link takes you to 20 or 30 of our preschool posts... everything from science experiments, math activities and games to letter activities, phonics games, activities for small more skills and more!

You might be interested in these related posts as well:
See you again soon! Remember our blog has moved to homeschoolden.com and we update our Homeschool Den Facebook Page a couple times a day during the weekday! ~Liesl


Monday, January 31, 2011

Earth Science: Layers of the Earth Hands-on Activity

Just adding this in on Tuesday: I found out today that I have Pneumonia which is why I've been feeling ever so lousy.

I first saw this activity last year at The Learning Ark. It fit in perfectly with our Earth Science unit. There is also a similar activity using a hard-boiled egg in the book we are using for this unit, How the Earth Works by Michelle O'Brien-Palmer.  One of the other books we are using, Planet Earth/Inside Out by Gail Gibbons, had some really good description and discussion of the layers of the earth. We used those books along with cards from Free Montessori.org to talk about the inner core, out core, mantle and crust.

As we read about each layer, we colored playdough and added a new layer.  We started with a small sphere. We kept adding layers until the ball was covered by the crust:
Then LD looked at the globe and tried to add the continents and oceans.  Would you believe, poor LD's place of birth, Australia, didn't really fit onto his globe??!  He stuck on a tiny, tiny piece of green playdough but it wasn't much to scale!
Then LD wondered what we'd do with it.  His eyes got wide when I pulled out a butcher knife!
But he got right into slicing the world apart!
We were pretty excited by the results. The layers showed up really clearly!
And we could even talk about how different areas were thicker and thinner.

Just to mention--I made a large pot of playdough for the girls in the morning and we added the colors later in the day.  If you don't add the colors when you're first making playdough BE SURE to wear gloves!!
EARLIER IN THE DAY: The girls were happy with a very light pink -- and this worked well for our layers of the earth colors later.  Even the inner core looks pretty yellow (the color we decided upon).

We'll be sharing a few more of our Earth Science Activities in the next couple of days.

------------------------------------------------------------------------------------

We have a 150+ page Earth Science Unit!

 
Earth Science Packet  150+ pages

Our Earth Science Unit covers the solar system, the layers of the Earth, plate tectonics, the ring of fire, faults, earthquakes, volcanoes and more.

It also includes instructions for more than a dozen hands-on activities we did with this unit. This includes activities about plate tectonics, convection currents, using a compass, earthquakes, volcanoes,  instructions on how to make a shake table and more!

Our packet is $9.99. 

We did this unit twice: My kids were in Grades 1, 4, and 6 when we did this unit the first time. They were in Grades 4, 7 and 9 when we covered it again (and added to the packet!).

Scroll down for more pictures and information!

When you click on the Buy Now button below, it will take you to Paypal. Upon receipt of payment you will immediately get a link to download this pdf in your browser. You will also receive an email from SendOwl Downloads to your PayPal email address which will give you a link to download.  Be sure to check your spam folder if that email doesn't appear.

Remember, you do not have to have a Paypal account to make a payment. Just click on the line that says, "Pay with a debit or credit card or PayPal credit." That gives you the option of paying with a credit card even if you don't have an actual Paypal account.
If you have any trouble with your order, please contact me (Liesl)  via email liesl at homeschoolden dot com or via our contact page or by replying to the email you receive from Sendowl.  ~Liesl

$9.99  

Don't forget to check your PayPal email address for the download link!

More pictures of what is included:

 
Pangaea and Plate Movement Activities  
Types of Plate Boundaries
Faults
The types of earthquake waves

 Volcanoes


In this unit, we especially liked these resources. These are affiliate links:


Hope you visit our new location at homeschoolden.com (the links above take you there!) or come visit us at our Homeschool Den Facebook Page. :) ~Liesl

Disclosure: Please note that some of the links in this post are affiliate links, and at no additional cost to you, I will earn a commission if you decide to make a purchase.

P.S. We have lots of other units. Here are the links to check those out


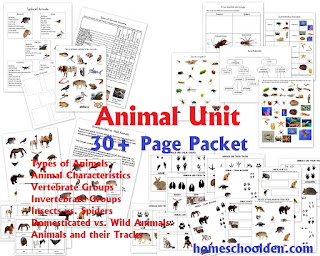
http://homeschoolden.com/2015/12/21/animal-unit-types-of-animals-worksheet-packet-30-pages/


http://homeschoolden.com/2016/04/26/ocean-unit-packet-marine-habitats-currents-ocean-floor-ocean-life-and-more/

http://homeschoolden.com/2016/11/14/electricity-and-circuits-stem-unit/


Hope you visit our new location at homeschoolden.com (the links above take you there!) or come visit us at our Homeschool Den Facebook Page. :) ~Liesl